Skip to content


How to Build an Epic Sandcastle: A Step-by-Step Guide for Kids, Parents & Families
Building a sandcastle is a quintessential beach tradition, but every parent knows the frustration: you spend 20 minutes scooping damp sand, turn over a bucket, and watch it immediately collapse into a sloppy mound.
The secret to building a towering, crumble-free sandcastle isn't luck, it's simple civil engineering! With the right sand-to-water ratio and a few easy techniques, your family can create impressive towers, arches, and battlements that last all afternoon.
Here is your ultimate step-by-step guide on how to build an epic sandcastle with your kids on your next beach vacation.
1. Gather the Right Tools
Before heading down to the shore, leave the flimsy, single-use plastic buckets behind. Traditional buckets force you to flip damp sand upside down, which almost always results in stuck sand and ruined towers. To build structures that actually stand, you need gear designed for upright packing and clean releases.
-
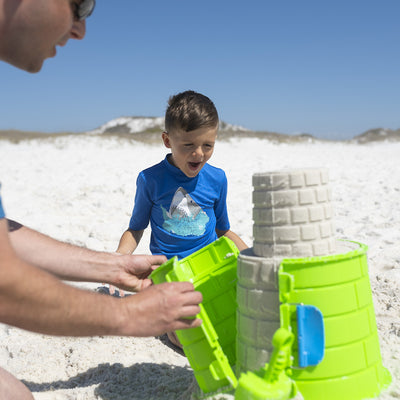
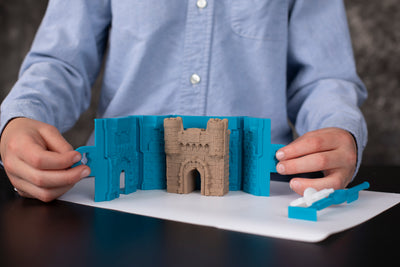
Split-mold castle systems: Molds with side latches (like our Create A Castle kits) allow you to pack sand upright and unclasp the sides, leaving a detailed tower standing every single time. Just always test your sand before packing the sand, otherwise if it's not a packable sand and is more coarse it will likely collapse!
-
Sturdy shovels: Wooden or thick-walled shovels move heavy, damp sand far faster than mini scoopers. Our pro and deluxe kits now include heavy duty plastic shovels to speed the process!
-
A large water bucket: Essential for bringing ocean water up to your building zone if you are building higher up above the tide line.
-
Carving tools: Spatulas, plastic knives, or multi-use detailers work wonders for carving out windows, brick textures, and stairs.
-
Mesh transport bag: Keeps all your tools organized and lets sand sift out before you load the car.
Pro Tip: Want to skip the crumbling frustration completely? Check out our Pro Tower Kit, featuring our patented split-mold technology, ergonomic shovels, an included backpack and professional carving tools that make building beautiful towers effortless!
2. Location Matters: Find the "Goldilocks Zone"
Where you set up camp on the beach makes or breaks your castle:
-
Too close to the water: High tide or a rogue wave will sweep your hard work away.
-
Too far up the beach: The sand is completely dry and won't stick together and will force you to add way more water, avoid this!
-
The Sweet Spot: Look for damp, compact sand just above the tide line where the waves recently washed over. Check tide charts online to ensure the tide is going out while you build to maximize your time building!
3. Master the Secret Formula: Sand + Water Ratio
Dry sand doesn't hold together because there is no surface tension. Water acts as the "glue" that binds sand grains together.
-
The 8:1 Rule: As a rule of thumb, use roughly 8 parts dry sand to 1 part water.
-
The Pancake Test: Grab a handful of damp sand and pack it into a ball. If it drips water, it is too wet. If it crumbles, it is too dry. It should hold its shape firmly, like bread dough.
Common Sandcastle Mistakes to Avoid
-
Pouring dry sand into molds: Always mix sand and water before packing it into molds, not inside the mold itself to prevent the sand sticking to the molds!
-
Rushing the release: Take your time unclasping or lifting your molds. Pulling too fast creates a vacuum that pulls top sand off with it. Always pull our molds straight back, don't turn sideways as that can create a collapse!
-
Building on loose sand: Always compact your base layer first. Building on loose beach sand is like trying to build a brick house on a mattress.
Ready for Your Next Beach Day?
Building impressive sandcastles is one of the best screen-free family activities for summer. It teaches kids basic geometry, patience, and creative problem solving (all while soaking up fresh air and sunshine).
Equip your family with tools built to build bigger, faster, and without the frustration in the sand or snow.
-
For serious builders who want maximum size and detail, grab the Create A Castle Pro Tower Kit!
-
For a versatile, family-friendly set that also works in both sand and winter snow, check out the Create A Castle Deluxe Tower Kit.